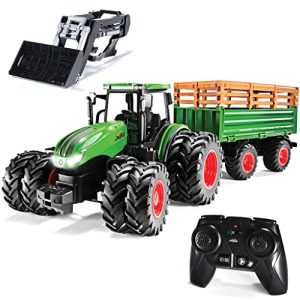
Have you ever picked up your child’s favorite toy, only to discover that the battery compartment is filled with a crusty, white residue? Battery corrosion can be a real headache, especially when it threatens to ruin a toy that your child loves.
But don’t worry, you’ve come to the right place. In this guide, you’ll learn how to clean a toy with battery corrosion, bringing it back to life and saving it from an untimely end. Imagine your child’s face lighting up with joy as their beloved toy works again, just as good as new.
Keep reading to discover a step-by-step process that is safe, effective, and easy to follow. Your child’s happiness is just a few simple steps away.
Identifying Battery Corrosion
Spotting battery corrosion is simple. Look for green or white crust on terminals. This crust can hinder battery function.
Identifying battery corrosion is crucial for maintaining your child’s toys. Corrosion can damage the toy and pose safety risks. Knowing what to look for can help you act quickly. Battery corrosion often appears as a white, crusty substance. This crust forms around the battery terminals. It can also look like a powdery residue. Recognizing these signs can save the toy from further damage.What Causes Battery Corrosion?
Battery corrosion happens when batteries leak. This leakage is due to chemical reactions inside the battery. Over time, the chemicals escape and react with air. This reaction creates the white, crusty substance you see. High temperatures and old batteries can speed up this process.Signs Of Corroded Batteries In Toys
Corroded batteries often cause a toy to stop working. You might notice a strange smell. A toy may also have a sticky or gritty residue. It’s important to check the battery compartment regularly. Look for any unusual discoloration or damage.Visual Indicators Of Corrosion
Corrosion often looks white or bluish. It can also appear as dark spots. This is especially true if the corrosion is severe. The affected area may feel rough or gritty. Sometimes, it even looks like a furry growth. Recognizing these indicators can help you address the issue promptly.Testing For Battery Corrosion
To test, remove the batteries carefully. Use gloves to protect your hands. Check if the toy functions with new batteries. If it doesn’t, corrosion may have damaged the contacts. In that case, cleaning might be necessary. Always handle batteries with caution.Safety Precautions
Handle toys with battery corrosion carefully. Wear gloves to protect skin. Use a mix of baking soda and water to clean the affected area.
Cleaning a toy with battery corrosion isn’t just about restoring its function; it’s about ensuring safety. Battery corrosion can be hazardous, releasing harmful chemicals that can irritate your skin and eyes. By taking proper safety precautions, you can protect yourself while effectively cleaning the toy. Here are some essential measures to keep in mind.Protective Gear
Wearing protective gear is crucial when dealing with battery corrosion. Rubber gloves should be your first line of defense to prevent skin irritation from the corrosive substances. If you ever tried cleaning without gloves, you’d know how quickly the irritation starts. Safety goggles are also recommended to shield your eyes from accidental splashes. Have you ever thought about how easily liquid can flick into your eye? It’s better to be safe than sorry. A mask can prevent inhalation of any fumes or dust particles. It’s a simple addition that can make a big difference.Ventilation Importance
Proper ventilation is another key aspect of safety. Working in a well-ventilated area helps disperse any fumes that might be released during the cleaning process. Imagine working in a closed space with no airflow; it would be like trapping yourself in a bubble of harmful chemicals. Consider opening windows or using a fan to keep air circulating. Have you ever noticed how fresh air can make even tedious tasks feel less burdensome? Fresh air is your friend here. If you’re cleaning indoors, make sure to keep doors open to allow air passage. It’s a simple step that ensures you’re not breathing in anything you shouldn’t. Taking these precautions not only protects you but also ensures that the cleaning process is as efficient as possible. Can you think of other ways to make safety a priority while cleaning?Gathering Cleaning Supplies
Cleaning a toy with battery corrosion requires the right supplies. Gathering these supplies ensures a safe and effective cleaning process. Having the right tools and agents will make the task easier. This section will guide you on what you’ll need.
Essential Tools
- Screwdriver:Useful for opening battery compartments.
- Gloves:Protect your hands from corrosive materials.
- Brush:A small toothbrush works well for scrubbing.
- Cloth or Paper Towels:For wiping and drying surfaces.
Recommended Cleaning Agents
- Vinegar:Helps neutralize battery acid.
- Baking Soda Paste:Effective for stubborn corrosion.
- Isopropyl Alcohol:Useful for a final wipe-down.
- Water:For rinsing and diluting cleaning agents.

Credit: www.reddit.com
Removing Corroded Batteries
Cleaning toys with battery corrosion involves using vinegar or lemon juice to dissolve rust. Scrub gently with a toothbrush to remove residue. Rinse thoroughly and dry completely before inserting new batteries.
Removing corroded batteries from your child’s favorite toy can be daunting. But with a little guidance, you can tackle this task effectively. Corroded batteries can cause damage to toys, and sometimes they just refuse to budge. Let’s explore how you can safely remove them and ensure your child’s toy is back in action.Safe Battery Disposal
Once you’ve removed the corroded batteries, it’s crucial to dispose of them safely. Corroded batteries contain harmful chemicals that can be dangerous to both the environment and your health. – Local Recycling Centers: Check if your local recycling center accepts batteries. This ensures they are handled correctly and don’t end up in a landfill. – Retail Drop-Off Points: Many electronic stores offer battery recycling services. You might be able to drop off your old batteries during your next visit. – Household Hazardous Waste Collection: Some communities have specific collection days for hazardous waste. Batteries often fall into this category, so be sure to keep an eye on local announcements. Remember, responsible disposal helps protect the environment and your community.Handling Stuck Batteries
Stuck batteries can be a real headache, but with patience, you can manage them safely. Have you ever felt like you were wrestling with a toy instead of fixing it? Here’s how to make the process smoother: – Tools at Hand: Use a small screwdriver or tweezers to gently pry the battery loose. Be careful not to apply too much force, as this can damage the toy. – Protective Gear: Wear gloves to protect your hands from corrosive substances. Battery corrosion can be irritating to your skin, so it’s better to be safe. – Corrosion Cleaner: If the battery is stuck due to corrosion build-up, consider using a vinegar solution or a commercial corrosion cleaner. Apply it to the affected area and let it sit for a few minutes. Have you ever thought about how regular maintenance can prevent such issues? By routinely checking and replacing batteries, you can avoid the frustration of stuck batteries in the future.Cleaning The Battery Compartment
Cleaning the battery compartment involves removing corrosion safely. Use a mixture of baking soda and water. Gently scrub with a toothbrush to clean the affected area.
Cleaning the battery compartment of a toy with corrosion can seem daunting, but it’s a task you can easily tackle with the right tools and techniques. Battery corrosion usually appears as a white, crusty residue, and it’s crucial to clean it thoroughly to restore the toy’s function. Before you begin, ensure you have protective gloves and eyewear for safety.Using Baking Soda Solution
Start by creating a simple baking soda solution. Mix a tablespoon of baking soda with a cup of water to form a paste. This mild abrasive is excellent for neutralizing battery acid. Dip a cotton swab or an old toothbrush into the solution. Gently scrub the corroded areas inside the battery compartment. The fizzing reaction will help lift the corrosion away. After scrubbing, use a clean cloth to wipe away the residue. Repeat the process if necessary until all corrosion is removed.Alternative Cleaning Solutions
If baking soda isn’t available, consider using vinegar or lemon juice. These acids can also neutralize the alkaline corrosion effectively. Apply a small amount of vinegar or lemon juice to a cotton swab. Carefully dab it onto the corroded area. Let it sit for a few minutes to break down the build-up. Wipe the area clean with a dry cloth. Ensure no moisture is left behind, as it can cause further damage.Remember, patience is key when cleaning corroded battery compartments. Have you ever considered what other household items might come in handy in such situations?

Credit: www.reddit.com
Checking For Damage
Inspect the battery compartment thoroughly for signs of corrosion or leakage. Look for white, powdery residue on the terminals. Ensure no damage to plastic parts, as it may affect functionality.
When cleaning a toy with battery corrosion, it’s vital to check for any damage that might have occurred. This process ensures the toy remains safe for use and functions properly after cleaning. You’ll want to focus on two main areas: the electrical contacts and the structural integrity of the toy.Inspecting Electrical Contacts
Start by examining the battery compartment for any corrosion that may have spread beyond the batteries themselves. Corroded contacts can disrupt the toy’s ability to function, and in some cases, can even become a safety hazard. Use a flashlight to closely inspect these metal components. Are they discolored or showing signs of rust? If so, they may require more than just a basic cleaning—replacement might be necessary. Cleaning the contacts gently with a cotton swab dipped in vinegar or lemon juice can help remove mild corrosion. Always ensure the toy is off and batteries are removed before you start.Assessing Structural Integrity
Beyond the electrical components, it’s essential to check the toy’s overall structure. Battery corrosion can sometimes cause damage to the plastic or other materials surrounding the battery compartment. Look for cracks, warping, or any signs that the plastic has become brittle. Even the smallest crack can grow over time, potentially leading to further damage. Ask yourself: Is the toy still safe for your child to play with? If there’s significant damage, it might be time to consider replacing the toy. Remember, safety should always come first. By carefully inspecting for damage, you’re ensuring a longer lifespan for the toy and a safer playtime for your little ones.Preventing Future Corrosion
Cleaning toys with battery corrosion involves using vinegar or lemon juice to neutralize the acid. Scrub gently with a toothbrush to remove residue. Ensure the battery compartment is dry before reinserting batteries to prevent future corrosion.
Cleaning toys with battery corrosion can be a tedious task. But preventing future corrosion can save time and frustration. Understanding how to care for battery-operated toys is crucial. Let’s explore some practical tips to keep toys corrosion-free.Choosing The Right Batteries
Select high-quality batteries for your toys. They last longer and leak less. Avoid mixing old and new batteries. This can cause imbalance and lead to leaks. Remove batteries from toys not in use for long periods. This simple step can prevent corrosion.Proper Storage Tips
Store toys in a cool, dry place. Moisture accelerates corrosion. Use airtight containers for storage. They keep out humidity and dust. Consider using silica gel packets. They absorb excess moisture and protect the toy. Regularly check toys for signs of battery damage. Early detection can prevent bigger problems.Reassembling The Toy
Reassembling the Toy Remove batteries and inspect for corrosion. Use vinegar or lemon juice to clean contacts. Rinse, dry, and reassemble.
Reassembling the toy after cleaning battery corrosion can seem like piecing together a jigsaw puzzle. The satisfaction of watching your child’s favorite toy come back to life makes the effort worthwhile. Let’s dive into the crucial steps to ensure everything fits perfectly and functions as it should.Ensuring Proper Fit
When putting your toy back together, start by laying out all the parts you removed. This makes it easier to see if anything’s missing. Ensure every screw and component is in its original place. If the toy’s pieces have different sizes or lengths, double-check their positions for a snug fit. A tip from personal experience: take photos during disassembly. This provides a visual reference when reassembling, reducing stress and potential mistakes.Testing The Toy’s Functionality
Once reassembled, it’s time for the moment of truth. Insert new batteries and switch on the toy. Does it light up or make sounds as expected? If not, check the battery contacts and ensure they are clean and aligned properly. Sometimes, a toy might need a gentle shake or a press of a button to kickstart its functions. If it still doesn’t work, consider if any internal wiring may have been disturbed. Have you ever faced a situation where a toy seemed perfectly reassembled, but just wouldn’t function? This can often be remedied by revisiting your steps carefully. Remember, patience is key. With careful reassembly and testing, your toy will be as good as new, ready to bring joy once more.
Credit: www.youtube.com
Frequently Asked Questions
How To Identify Battery Corrosion In Toys?
Battery corrosion in toys appears as a white or bluish crust. It often results from leaked battery acid. Check for discoloration and powdery residue. It can prevent toys from working properly. Regular checks can help avoid damage. Proper cleaning is essential for toy maintenance.
What Tools Are Needed For Cleaning?
To clean battery corrosion, gather cotton swabs, vinegar, and baking soda. Use gloves to protect your hands. A small brush can help remove debris. Ensure the toy is turned off before cleaning. Proper tools ensure effective cleaning and toy safety.
Can Vinegar Remove Battery Corrosion Effectively?
Yes, vinegar can effectively remove battery corrosion. Its acidic nature neutralizes alkaline deposits. Apply vinegar using a cotton swab on affected areas. Let it sit for a few minutes before wiping. Ensure thorough cleaning to prevent damage and restore toy functionality.
Is Baking Soda Safe For Toy Cleaning?
Baking soda is safe and effective for cleaning toys with corrosion. It neutralizes acid and cleans residue. Make a paste with water and apply gently. Use a brush for stubborn spots. Baking soda helps preserve toy integrity while cleaning.
Conclusion
Cleaning toys with battery corrosion is simple with the right steps. First, gather necessary supplies and follow safety precautions. Then, remove the corroded batteries carefully. Use vinegar or lemon juice to clean the corrosion. Rinse and dry the affected area thoroughly.
Finally, insert new batteries and test the toy. Regular maintenance can prevent future corrosion. Keep toys in dry places and check batteries often. Clean toys last longer and stay safe for children. Follow these steps and your toys will stay in great condition.
Enjoy happy playtime with clean, safe toys!