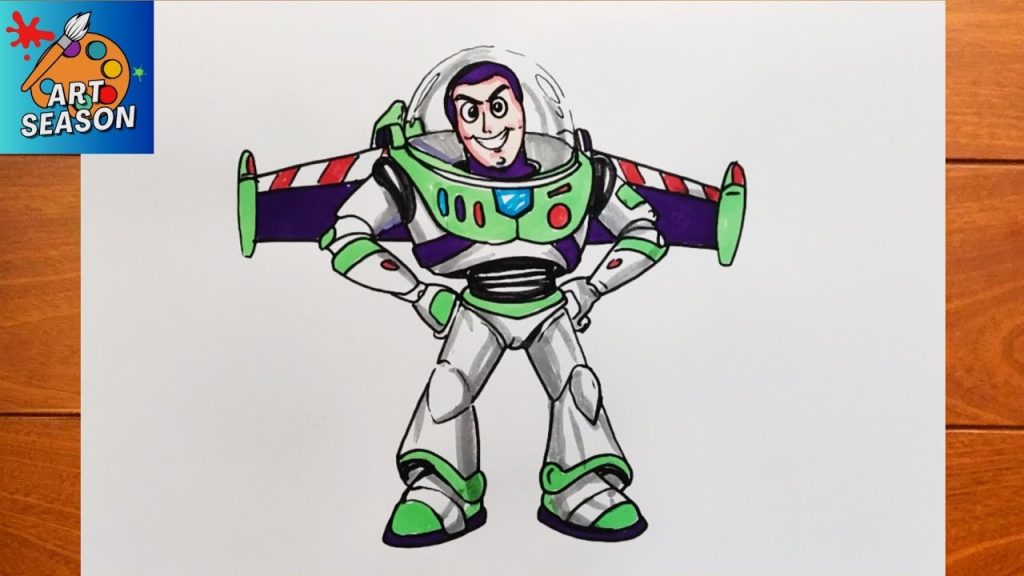
Have you ever watched Buzz Lightyear soar through space on your screen and wished you could bring him to life on paper? Drawing your favorite Toy Story character might seem like a daunting task, but it doesn’t have to be.
Imagine the pride you’ll feel when you create a perfect sketch of Buzz, capturing his heroic stance and adventurous spirit. In this guide, we’ll break down the process into simple steps that even a beginner can follow. You’ll discover tips and tricks that will help you create a drawing that looks like it jumped right out of the movie.
Ready to unleash your inner artist and impress your friends and family with your new skill? Let’s get started!
Materials Needed
Gather basic supplies like paper and pencils for sketching Buzz. Colored pencils or markers add vibrant details. An eraser helps refine your drawing, ensuring accuracy in capturing Buzz’s iconic features.
To create a stunning drawing of Buzz Lightyear from Toy Story, having the right materials is crucial. Each material plays a role in bringing your artwork to life. Here, we’ll outline what you need to start your creative journey.Sketching Paper
A good quality sketching paper is essential. It should be smooth and durable. This ensures your drawing looks neat and professional.Pencils
Use different types of pencils. A 2B pencil is great for outlines. A 4B pencil adds depth and shading.Eraser
A soft eraser is important. It helps correct mistakes without damaging the paper.Colored Pencils
Choose vibrant colored pencils. They add life to Buzz’s iconic suit. Green, purple, and white are must-haves.Fine Line Marker
A fine line marker is useful for final touches. It enhances outlines and details.Ruler
A ruler helps in drawing straight lines. It’s helpful for Buzz’s space suit and wings.Reference Image
A clear reference image of Buzz is essential. It guides proportions and features accurately. Having these materials ready will make your drawing process smooth. Start with a simple sketch and gradually add details. Enjoy the process and watch Buzz come to life on your paper!
Credit: www.youtube.com
Basic Shapes And Proportions
Drawing Buzz Lightyear from Toy Story requires understanding basic shapes and proportions. Buzz’s design is a mix of circles, ovals, and rectangles. These shapes help capture his iconic look. Begin with simple outlines. Focus on size and placement. This foundation makes details easier to add later.
Drawing The Head
Buzz’s head is large and round. Start with a circle for the skull. Add an oval for the chin. The chin oval sits below the circle. Draw two smaller circles inside for eyes. Place them near the top half. Sketch a curved line for the mouth. Add a line above the eyes for eyebrows. Remember, the head helmet covers the top.
Sketching The Torso
Buzz’s torso is a rectangle. Draw a wide rectangle under the head. The top of the rectangle should align with the head’s base. Add a smaller oval within the rectangle for the chest. This oval represents his muscular build. Draw two rectangles for the shoulders. These rectangles should overlap the chest oval slightly.
Creating The Limbs
Buzz’s limbs are cylindrical. Begin with the arms. Draw two long rectangles for the upper arms. Attach them to the shoulder rectangles. Add smaller rectangles for the forearms. These should be slightly bent. For the legs, sketch two large rectangles. Position them below the torso. Add ovals for knees and smaller rectangles for the lower legs. Finally, draw ovals for the feet.
Detailing The Face
Drawing Buzz Lightyear’s face is like bringing a beloved character to life on paper. The magic lies in capturing the unique features that make Buzz instantly recognizable. Paying attention to detail, especially in the facial features, is crucial. These elements not only define his expressions but also add depth and authenticity to your artwork. Let’s break down the process of detailing Buzz’s face, focusing on key features that make him stand out.
Eyes And Eyebrows
The eyes are the windows to Buzz’s adventurous spirit. Start by sketching large, oval shapes for his eyes, ensuring they are symmetrical. Buzz’s eyes often convey a sense of curiosity and determination, so consider how his gaze will enhance your drawing.
His eyebrows are thick and slightly arched, adding to his confident demeanor. Draw them with decisive strokes, capturing the essence of Buzz’s bold personality. Notice how the eyebrows frame the eyes and contribute to his expression.
Nose And Mouth
Buzz’s nose is small and simple, yet it’s important for maintaining facial proportions. Draw a subtle triangular shape that fits well between the eyes. This helps in achieving a balanced look.
The mouth is where Buzz’s charisma shines. His smile is often wide and confident. Draw a curved line to represent the upper lip, and a broader curve for the lower lip. Think about how Buzz’s smile can express his fearless nature.
As you detail Buzz Lightyear’s face, remember that each feature contributes to his iconic look. Have you ever noticed how certain details can change the emotion conveyed in a drawing? Use this insight to refine your art and capture Buzz’s essence. What subtle changes can you make to enhance his expression? Exploring these nuances will elevate your drawing and bring Buzz to life in a way that resonates with fans everywhere.
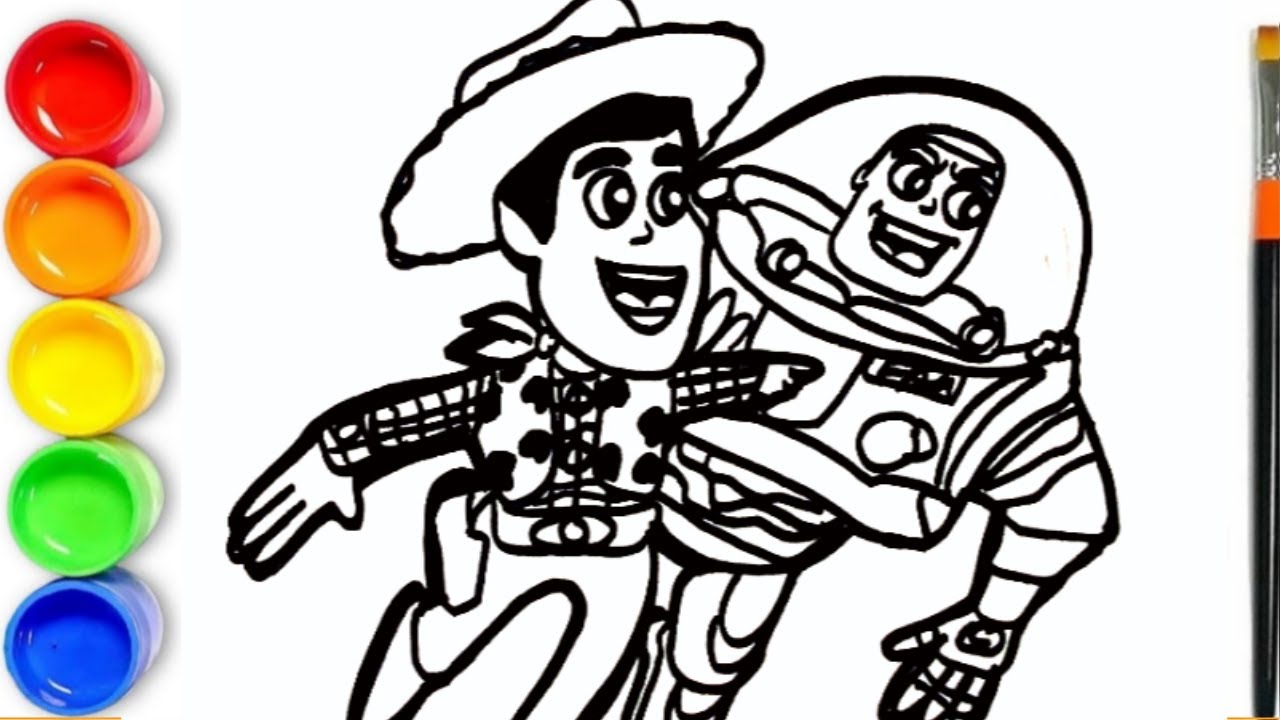
Credit: www.youtube.com
Adding The Suit Details
Capturing Buzz Lightyear’s iconic suit involves adding distinct details. Highlight the space ranger’s chest plate and buttons. Include his belt and green arm panels for authenticity.
Adding the suit details to your Buzz Lightyear drawing is where the magic truly happens. This stage transforms a basic outline into the iconic Space Ranger we all know and love. It’s the perfect opportunity to flex your creativity while staying true to Buzz’s dynamic design. Did you know?Many artists find this step to be the most satisfying part of the process. It’s like watching your favorite character leap off the page.Chest Armor
Buzz’s chest armor is distinctive and requires careful attention to detail. Start by drawing the central piece, resembling a shield, with a smooth surface and a rounded top. Don’t forget the rectangular button panel on the left side—these tiny squares add an interactive feel to Buzz’s suit. Add the circular emblem on the right. This detail is crucial for capturing Buzz’s adventurous spirit. Use a steady hand to ensure your lines are clean and precise. Tip:Use light pencil strokes initially, so you can easily correct any mistakes.Arm And Leg Panels
Buzz’s arms and legs feature segmented panels that give his suit a high-tech appearance. Begin by outlining the cylindrical shapes of the arms and legs. Divide these into sections with soft, curved lines to mimic his armor’s structure. Pay attention to the joints; they should be slightly more pronounced, emphasizing his robotic nature. Add the intricate details like the small, rectangular panels on his forearms. These details enhance the mechanical look and are essential for authenticity. Remember:It’s okay to experiment with textures and shading to bring depth to these panels. After all, would Buzz Lightyear really be Buzz without those iconic suit details?Drawing The Wings
Drawing Buzz Lightyear’s wings can be exciting and rewarding. The wings are a key part of his look. They give him that iconic space ranger appearance. Let’s explore how to capture these details effectively.
Wing Structure
The wings are wide and slightly curved. Start by sketching two rectangles extending from his back. The top edge should be slightly curved to show movement. Make sure the wings are symmetrical. This adds balance to the drawing.
Buzz’s wings have a unique shape. Draw a diagonal line from the bottom corner of each rectangle. Connect it to the opposite top corner. This creates a tapered, aerodynamic form. Keep the wing span broad enough to look impressive.
Adding Patterns
Buzz’s wings feature bold patterns. Add two parallel stripes along the top edge. Use red and white colors for these stripes. They should follow the curve of the wing. This enhances the visual appeal.
Each wing has a small, rectangular panel near the top. Draw these panels using thin lines. Add small circles inside each panel. These represent buttons or lights. They add to the futuristic design.
Finish by outlining the wings with dark lines. This makes them stand out. Ensure the patterns are clear and sharp. This completes Buzz’s iconic wing design.
Final Touches
Add vibrant colors to Buzz’s suit for realistic appeal. Refine facial details to capture his heroic expression. Enhance shadows and highlights for depth and dimension.
Final touches bring your Buzz Lightyear drawing to life. They add depth and character. Small details make a big difference. Let’s explore how to enhance your artwork.Shading And Highlights
Shading adds depth to your drawing. Use light pencil strokes for soft shadows. Apply more pressure for darker areas. Focus on Buzz’s suit and face. Highlights give a 3D effect. Use an eraser to create light spots. Add highlights on Buzz’s helmet and chest. This contrast makes Buzz pop off the page.Outlining The Drawing
Outlining defines Buzz’s features. Use a fine-tipped pen for clean lines. Trace over your pencil marks carefully. Make lines around Buzz’s helmet and wings bold. This step sharpens your artwork. It brings clarity and focus. Ensure lines are smooth and consistent. This gives Buzz a polished look.Common Mistakes To Avoid
Avoid drawing Buzz’s helmet too small or misplacing his facial features. Use the right colors for his suit. Ensure his wings are proportional to his body for a realistic look.
Drawing Buzz Lightyear from Toy Story can be a fun challenge. Many people make common mistakes that affect the final look. Knowing these errors helps you avoid them and improve your drawing skills.Ignoring Proportions
Many artists overlook Buzz’s proportions. His head is large compared to his body. Pay attention to the size of his arms and legs. This keeps Buzz looking true to character.Overcomplicating Details
Buzz has a simple design. Some artists add too many details. This can make him look messy. Stick to his basic shapes for a cleaner look.Incorrect Facial Features
Buzz’s face has distinct features. His eyebrows and chin are unique. Misplacing these changes his appearance. Focus on getting them right.Skipping Light And Shadow
Buzz’s suit has many curves. Light and shadow bring depth to your drawing. Missing these makes your drawing flat. Use shading for a more realistic look.Inconsistent Line Work
Uneven lines can disrupt your drawing. Buzz has smooth lines. Practice steady hand movements. This ensures a clean and neat image. Avoiding these common mistakes makes your Buzz Lightyear drawing more accurate. Pay attention to details for the best results.
Credit: www.youtube.com
Frequently Asked Questions
How Do I Start Drawing Buzz Lightyear?
Begin by sketching basic shapes for Buzz’s body. Use circles and ovals for the head and limbs. This helps establish proportions. Next, refine these shapes into detailed outlines. Pay attention to his iconic suit details. Gradually add facial features and suit elements to complete the drawing.
What Materials Are Best For Drawing Buzz?
Use pencils for initial sketches and outlines. Fine-tipped pens are great for adding details. Colored pencils or markers work well for vibrant colors. Ensure you have an eraser for corrections. Quality paper helps achieve clean lines and smooth color application.
Can Beginners Draw Buzz Lightyear Easily?
Yes, beginners can draw Buzz with practice. Start with simple shapes to outline his form. Gradually add details. Follow step-by-step tutorials available online. Focus on basic features before adding intricate elements. Consistent practice improves skill and confidence in drawing Buzz Lightyear.
Are There Online Tutorials For Drawing Buzz?
Yes, many online tutorials guide you in drawing Buzz Lightyear. Platforms like YouTube offer step-by-step video guides. Websites provide illustrated instructions. These resources cater to various skill levels, from beginner to advanced. Following tutorials enhances your drawing technique and creativity.
Conclusion
Drawing Buzz Lightyear can be fun for everyone. Follow simple steps to improve your skills. Practice regularly to get better results. Remember, patience is key. Enjoy the process and don’t stress about perfection. Each drawing helps you learn something new.
Share your creations with friends. They might offer helpful feedback. Keep experimenting with different styles. Let your creativity shine through your art. Celebrate small victories along the way. Your Buzz Lightyear drawing will surely impress. Stay motivated and keep drawing.
You’re on the right path to becoming a better artist.