Are you tired of stepping on toy cars and tripping over building blocks scattered all over your living room floor? You’re not alone.
Keeping your child’s play area tidy can feel like an endless battle. But what if you could turn chaos into order without spending a fortune on store-bought solutions? Imagine transforming your home into a clutter-free zone with simple DIY toy organizer ideas that are not only practical but also fun to create.
We’ll explore innovative and budget-friendly ways to organize your child’s toys. Whether you have a tiny apartment or a spacious house, these DIY solutions will fit perfectly into your lifestyle. Plus, you’ll enjoy the satisfaction of crafting something with your own hands. Dive in and discover how you can bring harmony back to your home while encouraging your child to keep their toys neat and tidy.
Credit: www.familyhandyman.com
Benefits Of Diy Toy Organizers
Creating your own toy organizers saves money and boosts creativity. It allows for personal customization, ensuring toys fit perfectly. With DIY projects, families can bond while crafting practical storage solutions.
When you decide to embark on the DIY journey of creating toy organizers, you might find yourself pleasantly surprised by the myriad of benefits it brings along. Not only do these organizers help in tidying up your living space, but they also foster creativity and resourcefulness. By crafting your own toy organizers, you create solutions tailored to your needs while potentially saving money.Cost Efficiency
Making toy organizers yourself can be significantly cheaper than buying pre-made ones. You can use materials you already have at home, like cardboard boxes or plastic containers, reducing the need to purchase expensive storage solutions. This approach allows you to allocate resources where they are most needed, perhaps investing in more toys or educational materials for your children.Customization
DIY toy organizers give you the freedom to design storage that fits perfectly in your space and suits your child’s needs. If your child loves puzzles, you can create compartments specifically for puzzle pieces. This customization helps in keeping their play area neat while catering to their preferences, making it easier for them to find and store their toys.Encouraging Creativity
Engaging in DIY projects can be a fantastic way to spark creativity not only in yourself but also in your children. Invite them to help decorate their toy organizers with stickers, paint, or other craft supplies. This involvement can be a great bonding activity and encourages them to take pride in their space.Building Skills
Crafting your toy organizers can help you develop new skills or hone existing ones. Whether it’s learning how to use tools, understanding spatial design, or simply working with different materials, each project offers a chance to grow. These skills might come in handy for future DIY projects around your home.Environmental Impact
By repurposing materials you already own, you contribute to reducing waste. DIY toy organizers encourage the reuse of items like old shoeboxes, fabric scraps, or jars, minimizing the need for new products. This eco-friendly approach not only helps the planet but can also instill environmental awareness in your children. Considering these benefits, have you ever thought about what you could create with items already in your home? The possibilities are endless, and the satisfaction of crafting something functional and beautiful is well worth the effort.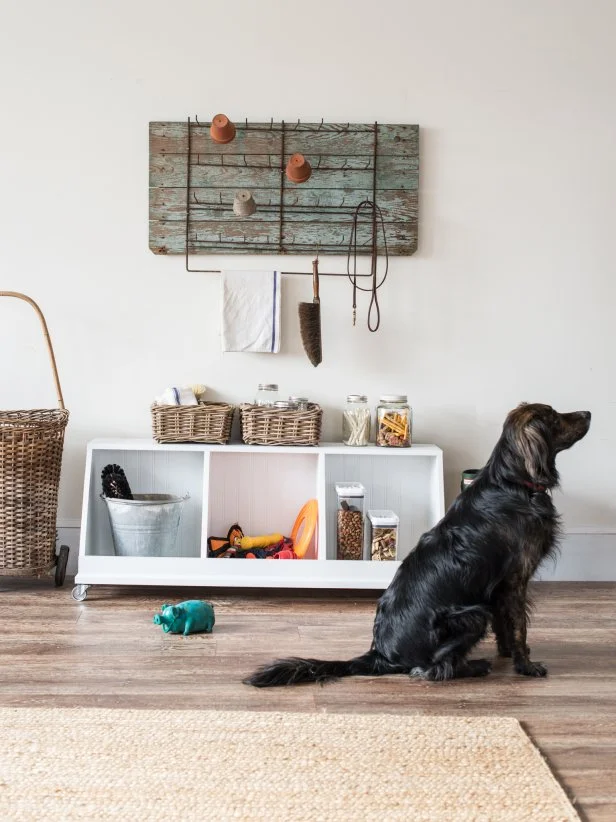
Credit: www.hgtv.com
Choosing The Right Materials
Choosing the right materials for your DIY toy organizer can make all the difference in terms of durability, aesthetics, and sustainability. You want something that will withstand the test of time and the enthusiastic energy of little ones. At the same time, it should align with your values and budget.
Sustainable Options
Many parents today are opting for sustainable materials to create eco-friendly toy organizers. Consider using reclaimed wood or bamboo, both of which are renewable and sturdy. These materials not only reduce your carbon footprint but also add a natural charm to your space.
If you’re looking for something lightweight, recycled cardboard can be an excellent choice. It’s surprisingly strong and can be easily decorated with non-toxic paints. Have you ever thought about using old crates or pallets? They can be transformed into beautiful storage solutions with just a little creativity.
Budget-friendly Choices
Creating a toy organizer doesn’t have to break the bank. You can find affordable materials right at your local dollar store or even in your garage. Plastic bins are inexpensive and easy to clean, making them a popular choice for many families.
Old shoe boxes or cereal boxes can be upcycled into colorful and functional organizers. Wrap them with bright paper or fabric scraps to give them a fresh look. What about using fabric baskets or tote bags? They’re budget-friendly and can be easily moved around, offering a versatile storage solution.
Think about what you already have at home. Sometimes the best materials are hiding in plain sight, just waiting for a little inspiration to transform them into something useful.
Upcycling Household Items
Transform old boxes into playful toy organizers. Paint them vibrant colors. Add labels for easy sorting and fun.
Upcycling household items is a sustainable and creative way to organize toys. Transforming old furniture and everyday containers can save money and reduce waste. Discover how repurposing items can simplify your space.Repurposing Old Furniture
Old furniture can become charming toy organizers. An unused bookshelf can display toys neatly. Paint it bright colors for a playful touch. Convert a wooden dresser into a toy storage unit. Remove drawers and use baskets for easy access. An old coffee table can serve as a play area with built-in storage. Add bins underneath for hidden storage.Using Everyday Containers
Everyday containers offer simple toy storage solutions. Use mason jars for small toys and craft supplies. Label them for easy identification. Shoe boxes can be decorated and used for larger items. Stack them to save space. Plastic bins can hold a variety of toys. Place them under the bed for hidden storage. Baskets can organize stuffed animals on shelves. Choose colorful baskets to add fun to the room.Creative Storage Solutions
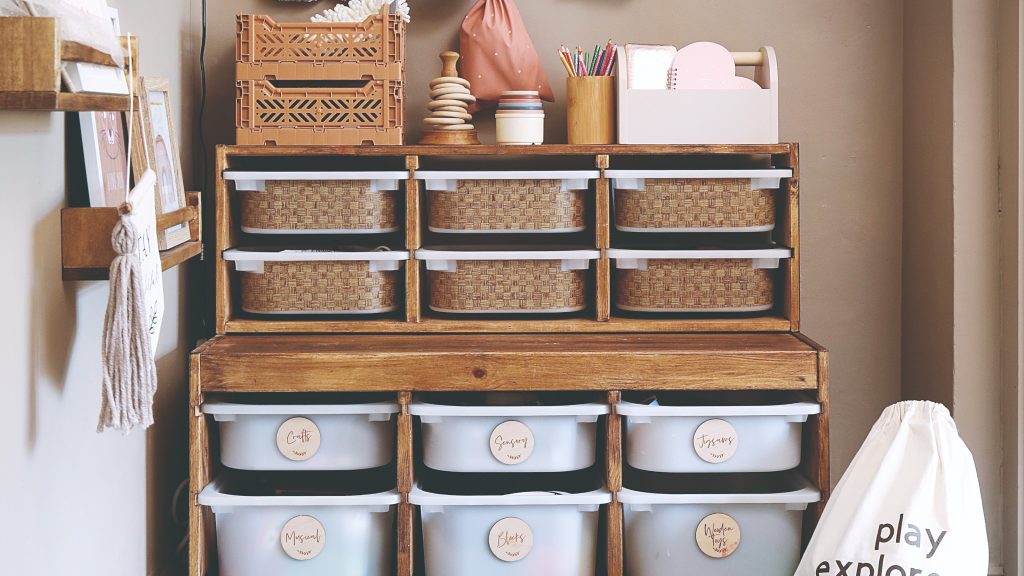
Transform cluttered playrooms with DIY toy organizers. Use bins, shelves, and labels for easy access and tidiness. Creative storage solutions maximize space and keep toys neatly arranged.
If you’re tired of stepping on stray Lego pieces or searching for that elusive toy car, it’s time to rethink how you organize your child’s playthings. Creative storage solutions not only bring order to chaos but also make tidying up fun and engaging for kids. With a few DIY hacks, you can transform your space into a haven of organization without breaking the bank.Wall-mounted Organizers
Wall-mounted organizers are a game-changer when it comes to freeing up floor space. Consider installing floating shelves at a low height, so your child can easily reach their toys. Pegboards are another versatile option; they can hold baskets, hooks, and shelves for a customizable storage solution. Magnetic strips on the wall can display and store metal toys like cars and trains. You could even repurpose old spice racks for small toy collections. This not only organizes toys but also turns them into a colorful display.Multi-purpose Furniture
Furniture that doubles as storage is a savvy choice for any playroom. Think about benches with built-in bins or ottomans that open up to reveal hidden compartments. These pieces provide seating and storage in one, perfect for smaller spaces. A low bookshelf can serve both as a toy organizer and a play surface. Add baskets or bins for easy sorting and labeling. Have you ever considered a bed with drawers underneath? It’s a sneaky spot to hide larger toys or extra bedding. Which of these creative storage solutions will you try first? Transforming your toy chaos into organized bliss is more achievable than you think. With a bit of creativity, your home can be as tidy as your dreams!Fun And Functional Labels
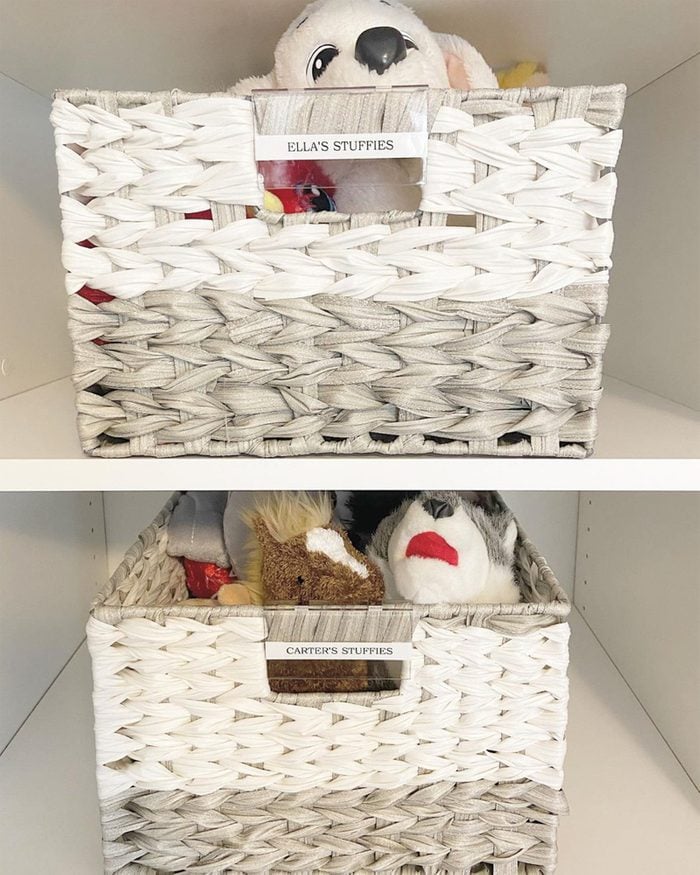
Organizing toys can be a delightful adventure with the right labels. Fun and functional labels not only help in maintaining order but also make tidying up an engaging activity for kids. Whether you choose a color-coded system or picture labels, these creative solutions can transform the mundane task of organizing into a playful and educational experience.
Color-coded Systems
Color coding is a simple yet effective way to organize toys. Assign a specific color to each type of toy or category. For instance, red bins for art supplies, blue for building blocks, and green for plush toys. This method makes it easy for kids to identify where each toy belongs.
- Use vibrant colors that catch children’s attention.
- Label bins with colored stickers or markers that match the assigned color.
- Engage kids by asking them to sort toys according to color.
Imagine your child learning the colors while organizing. It’s not just about tidying up; it’s also a fun learning process. Have you ever tried mixing up colors and seeing if your child notices?
Picture Labels For Young Kids
Pictures are powerful tools, especially for younger children who can’t read yet. Use photo labels of toys on bins or shelves. For instance, a picture of a teddy bear on the bin for stuffed animals or a photo of Legos for building blocks.
- Choose clear and easily recognizable images.
- Laminate pictures for durability.
- Encourage kids to match toys to the pictures.
Picture labels can make organizing a game. They enhance visual learning and make the process intuitive for little ones. Can you imagine the excitement in your child’s eyes when they successfully match a toy to its picture?
These labeling techniques are not just about keeping rooms tidy; they also foster independence and responsibility in children. They make organization fun, functional, and engaging. So why not give these ideas a try and watch how your kids embrace the art of organizing their toys?
Involving Kids In The Process
Get kids involved in making a DIY toy organizer. It’s a fun way to teach responsibility and creativity. Simple tasks like sorting and labeling can help them feel accomplished.
Involving kids in organizing their toys can be a fun adventure. It teaches responsibility and creativity. Kids can learn to care for their belongings. This process also strengthens family bonds. Plus, it makes organizing less of a chore. Let’s explore some engaging ways to involve kids.Craft Projects For Kids
Creating toy organizers can be a fun craft. Kids can use colorful boxes or baskets. Let them decorate with stickers and paint. This makes the organizer unique and personal. Crafting helps improve fine motor skills. Use safe, child-friendly materials. Kids will enjoy seeing their art used daily. Encourage them to choose colors and designs. This fosters creativity and ownership.Teaching Organizational Skills
Involving kids teaches them how to organize. Start with simple sorting tasks. Let them group toys by type or color. Explain the benefits of staying organized. It saves time and reduces stress. Use labels for easy identification. Discuss how to put toys back after play. Praise their efforts to encourage them. This builds confidence and responsibility. Show them how a tidy space is more enjoyable.Maintaining An Organized Play Area
Creating a tidy play area is easier with DIY toy organizer ideas. Use baskets, shelves, and bins for simple storage solutions. Transform old furniture into creative storage spaces to keep toys neatly arranged.
Maintaining an organized play area is a task that requires consistency and creativity. It’s not just about keeping things tidy; it’s about creating a space where imagination can thrive without chaos. A well-organized play area can transform the way your kids interact with their toys and even the way you feel about managing the inevitable mess.Regular Cleanup Routines
Establishing regular cleanup routines is essential for maintaining order. Set aside specific times each day for tidying up. This could be before dinner or right before bedtime. Make cleanup a fun activity rather than a chore. Play some music or turn it into a game where your child gets a reward for picking up the most toys. Consistency is key—over time, these routines become habits.Rotating Toys For Freshness
To keep the play area engaging, consider rotating toys. Instead of overwhelming your child with every toy at once, store some away and swap them out periodically. This method not only keeps the play area less cluttered but also makes old toys feel new again. You might notice that your child plays more creatively with fewer toys available. Ask yourself: How often do you find unused toys just gathering dust? By rotating them, you’re maximizing their value and your child’s interest. Maintaining an organized play area doesn’t have to feel overwhelming. With a little planning and creativity, you can create a space that is both functional and inspiring.
Credit: www.tiktok.com
Inspiration From Other Diy Enthusiasts
When seeking inspiration for DIY toy organizers, tapping into the creativity of fellow DIY enthusiasts can be incredibly rewarding. With a vast array of ideas shared across online platforms, you can discover unique solutions that may perfectly suit your space and style. Learning from others’ experiences not only sparks creativity but also provides practical tips that have been tried and tested.
Online Communities And Tutorials
Online communities are treasure troves of DIY knowledge. Websites like Pinterest and Reddit have dedicated sections for DIY enthusiasts, where you can find numerous toy organizer ideas. These platforms allow you to browse through various designs and techniques shared by people from all over the world.
YouTube tutorials are another excellent resource. Many DIY enthusiasts upload step-by-step guides on creating toy organizers. Watching these videos can give you a clearer understanding of the process, making it easier to replicate the projects at home. Don’t forget to join Facebook groups dedicated to DIY projects, where members often exchange valuable tips and tricks.
Showcase Of Unique Designs
Browsing through DIY blogs can reveal some truly unique toy organizer designs. One popular idea is using wooden crates painted in vibrant colors to create stackable storage units. These not only organize toys but also add a splash of color to any room.
Another creative design is using an old bookshelf, transforming it into a toy organizer by adding small bins and labels. This approach helps in categorizing toys and makes it easy for children to find their favorite ones. Have you ever considered using pegboards? They can be customized with hooks and baskets, offering a versatile storage solution.
What unique ideas have you stumbled upon that transformed your toy chaos into a neat haven? Share your thoughts or even your DIY success stories in the comments below!
Frequently Asked Questions
How Can I Make A Toy Organizer?
To create a toy organizer, first, assess the available space and select materials. Use bins, shelves, or baskets to categorize toys. Label each section for easy identification. Consider repurposing old furniture or using pegboards for vertical storage. Ensure the organizer is accessible and safe for children.
What Materials Are Best For Toy Organizers?
Durable materials like wood, plastic, and metal are ideal for toy organizers. Choose materials that are easy to clean and maintain. Use fabric bins for soft toys and plastic containers for building blocks. Ensure the materials are sturdy enough to hold the weight of toys and withstand daily use.
How Do I Organize Toys Effectively?
Start by categorizing toys based on type, age, or usage. Use clear bins for visibility and label each section. Regularly declutter and rotate toys to maintain interest. Store frequently used toys at accessible heights. Incorporate fun elements like color coding to make organizing enjoyable for children.
Can I Repurpose Furniture For Toy Storage?
Yes, repurposing furniture for toy storage is a creative option. Use old bookshelves, dressers, or cabinets as organizers. Add baskets or bins to drawers and shelves. Secure furniture to the wall for safety. Customize the furniture with paint or decals to match the room’s theme.
Conclusion
Creating your own toy organizer can be both fun and practical. It keeps the play area tidy and makes finding toys easier. Plus, it offers a chance to get creative. Use boxes, baskets, or shelves to fit your space. Paint them in bright colors for a lively touch.
Label each section for better organization. Involve kids in the process, making it a fun project. Customizing your toy storage saves money and adds a personal touch. Remember, the simpler, the better. Enjoy crafting your perfect toy organizer and watch your space transform!