Have you ever watched Toy Story and thought about bringing Woody to life on paper? You’re not alone!
Drawing your favorite characters can be a fun and rewarding experience. Imagine the satisfaction of capturing Woody’s unique charm and adventurous spirit with just a pencil and some paper. Whether you’re a budding artist or just looking for a creative way to relax, learning how to draw Woody can be both enjoyable and fulfilling.
As you follow along, you’ll discover simple steps and techniques that make the process easy, even if you’ve never drawn before. By the end of this article, you’ll not only have your very own Woody masterpiece but also a newfound confidence in your artistic skills. Ready to give it a shot? Let’s get started!

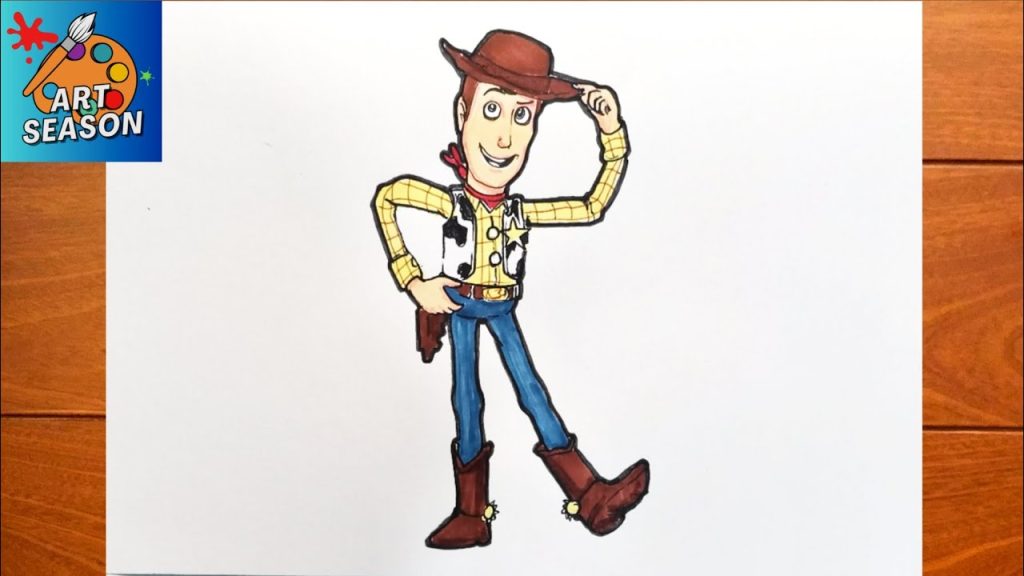
Credit: www.youtube.com
Materials Needed
Gather paper, pencils, erasers, and colored markers. These tools help bring Woody from Toy Story to life. Keep a reference image handy for accuracy.
Gathering the right materials is key to drawing Woody from Toy Story. With the proper tools, your drawing experience becomes smoother and more enjoyable. This section outlines everything you’ll need to create your own masterpiece.1. Pencils
The foundation of your drawing. Use HB for sketching and 2B for details. A range of pencils helps capture Woody’s unique features.2. Erasers
Essential for correcting mistakes. A kneaded eraser works well for lightening lines. A vinyl eraser provides precise corrections.3. Paper
Choose high-quality drawing paper. A smooth surface is ideal for clean lines. Consider a sketchbook for practice and convenience.4. Coloring Tools
Colored pencils or markers will bring Woody to life. Vibrant colors like yellow, blue, and brown are needed.5. Ruler
Useful for drawing straight lines and maintaining proportions. A ruler helps keep Woody’s design accurate.6. Reference Image
A clear picture of Woody is crucial. It guides you in capturing his likeness.7. Sharpener
Keep your pencils sharp for fine details. A quality sharpener ensures consistent results. With these materials, you’re ready to start drawing Woody. Each tool plays a role in capturing his iconic look.Basic Sketch
Begin by drawing Woody’s large, oval-shaped head. Add his iconic cowboy hat on top. Next, sketch his slim, rectangular body and long, thin legs. Pay attention to his cheerful face with big eyes and a wide smile. Finally, include his distinctive vest, badge, and boots for a complete look.
Creating a basic sketch of Woody from Toy Story is a rewarding experience for any budding artist. Capturing Woody’s iconic features requires just a few simple steps. This process not only hones your drawing skills but also deepens your appreciation for character design.Outline Woody’s Head
Start by sketching a large oval shape for Woody’s head. This shape serves as the foundation for his facial features. Add a horizontal line across the middle to guide the placement of his eyes. Draw a vertical line down the center to ensure symmetry. Next, sketch Woody’s eyes on the horizontal line. His eyes are large and expressive, capturing his friendly personality. Draw his nose just below the eyes. It’s small and rounded. Add his wide, welcoming smile beneath the nose to bring his face to life. Don’t forget to sketch his iconic cowboy hat on top of the oval. It should tilt slightly to one side, emphasizing his playful demeanor.Draw The Body Framework
Begin by drawing a vertical line extending from the head. This line represents Woody’s spine and will help balance his posture. Sketch an oval for his torso around the spine line. Woody has a slim build, so keep the oval narrow. Add two lines extending from the top of the torso for his arms. Woody’s arms are long and slightly bent at the elbows. Draw two more lines from the bottom of the torso for his legs. His legs are also long, reflecting his lanky character. Finally, add small ovals at the ends of the arms and legs for hands and feet placement. These basic shapes provide a framework for adding detail later.Isn’t it fascinating how simple shapes can form the basis of a beloved character? Try experimenting with these steps and see how your version of Woody takes shape.
Facial Features
Capturing Woody’s facial features brings his character to life. Focus on his expressive elements. His face tells stories of adventure, humor, and warmth.
Eyes And Eyebrows
Woody’s eyes are big and bright. They express excitement and curiosity. Draw two large ovals for the eyes. Add a smaller circle inside for pupils. Place the pupils off-center for a lively look. Woody’s eyebrows are thick and expressive. They sit just above his eyes. Draw them slightly arched for a friendly appearance.
Nose And Mouth
His nose is small and round. It sits right between his eyes. Draw a simple curve for a nose. The mouth is wide and welcoming. Sketch a curved line for a smile. Add detail with two short lines at the ends. This creates a joyful expression. Make sure the mouth reflects Woody’s cheerful personality.

Credit: www.youtube.com
Hat And Hair
Drawing Woody from Toy Story is an exciting challenge, especially when capturing the essence of his iconic hat and hair. These elements are crucial in conveying his cowboy persona and playful character. Whether you’re sketching for fun or aiming for a masterpiece, focusing on these features will bring Woody to life on your canvas.
Shape Of The Cowboy Hat
Woody’s cowboy hat is a signature piece that adds charm and authenticity to his look. Start by sketching an oval shape for the brim, ensuring it’s slightly tilted to give the hat its characteristic flair. This tilt often represents Woody’s adventurous spirit.
Next, draw the crown, which should taper gently from the brim. The hat is not too tall, so keep it proportionate to Woody’s head. The details, such as the stitched patterns or creases, can be added later to enhance realism.
Imagine the hat like an umbrella—protective yet stylish. Have you ever thought about how a hat can change the perception of a character? Woody’s hat does just that, transforming him into a cowboy ready for adventure.
Detail Woody’s Hair
Woody’s hair is often hidden under his hat, but it’s essential to get it right for those moments when he tips his hat. His hair is a simple brown style, parted neatly with slight waves. Begin by drawing the outline of his head, then add the hair peeking from under the hat.
Focus on the texture and direction of the strands. Woody’s hair is smooth, not too detailed, but the subtle waves add a sense of motion. This captures his lively personality perfectly.
Consider how a little detail in hair can express emotion or motion. Have you noticed how a slight wave can imply movement? This subtlety can make Woody appear more dynamic and engaging.
Clothing Details
Capture Woody’s charm by focusing on key clothing details. Sketch his cowboy hat, checkered shirt, and denim jeans. Highlight his signature vest and sheriff badge for authenticity.
Drawing Woody from Toy Story requires attention to detail, especially his clothing. His outfit is iconic and gives him a cowboy charm. Each piece contributes to his distinct look. Let’s dive into the details of his clothing, starting with his shirt and vest, followed by his jeans and belt.Shirt And Vest
Woody’s shirt is bright yellow with red checkered patterns. It’s a classic Western shirt. Start with a simple yellow base. Add red lines to create the checkered design. The shirt has long sleeves, ending in cuffs. His vest is black and white cow-print. Draw the vest over the shirt, leaving space around the neck. The vest has a V-shape cut at the bottom. Ensure the cow spots are uneven and irregular. This adds realism to his cowboy style.Jeans And Belt
Woody wears blue jeans, which fit snugly around his legs. Begin with straight lines to outline the jeans. Add curves to show the folds and creases. His belt is brown with a silver buckle. Draw the belt tightly around his waist. The buckle is rectangular, adding detail to his outfit. Make sure the belt loops are visible. This completes his authentic cowboy look.Arms And Hands
Drawing Woody from Toy Story can be a fun experience. His arms and hands play a vital role in capturing his cowboy charm. Let’s explore how to position and draw them for a perfect sketch.
Positioning The Arms
Woody’s arms are often outstretched. They express his lively personality. Start by sketching simple stick lines for each arm. Ensure the shoulders align with the body. This helps maintain balance in your drawing.
Consider the angle. Woody’s arms often bend at the elbows. This adds dynamic movement. Use light, curved lines to represent the bend. It brings energy to the drawing.
Drawing The Hands
Woody’s hands are crucial for his expressive gestures. Begin with basic shapes. Ovals work well for palms. Fingers can be drawn as short, cylindrical shapes. Keep them simple and relaxed.
Focus on the thumb’s position. Woody often raises it in a friendly gesture. Draw it apart from the fingers. This highlights his welcoming nature.
Details bring the hands to life. Add small lines for knuckles. This texture adds realism. Enhance with slight shadows under the fingers. It gives depth to the sketch.
Boots And Legs
Begin by sketching Woody’s boots, adding the rounded toes and small heels. Draw his legs with slim, straight lines, capturing his tall cowboy stance.
Drawing Woody from Toy Story can be an exciting journey, especially when you focus on perfecting his iconic boots and legs. These elements not only define Woody’s character but also challenge your artistic skills. Each line and curve contribute to his signature cowboy look. By paying close attention to these details, you can bring Woody to life on paper.Outline The Boots
Begin by sketching the general shape of Woody’s boots. These boots have a classic cowboy style, so make sure to capture their wide, rounded tops and pointed toes. Start with two oval shapes for the soles, slightly angled to show perspective. Next, draw the boot shafts extending upward. Aim for a slight curve to mimic the natural slouch of cowboy boots. Add a small heel to each boot, giving them a distinct lift. This subtle detail adds to the authenticity of Woody’s western charm.Leg Details
Woody’s legs are slender and slightly elongated, giving him a playful and energetic stance. Begin by drawing two straight lines from the top of each boot to represent his legs. Add slight bends at the knees for a more dynamic pose. Now, enhance the legs with details that reflect Woody’s character. Draw the seams of his jeans running along the sides, and add light shading to suggest folds and creases in the fabric. Think about the way you move when wearing jeans. Your drawing should reflect those natural folds and bends. Adding these leg details can breathe life into your illustration, capturing Woody’s adventurous spirit. What kind of pose will your Woody be in? Considering his posture can make your drawing more dynamic and engaging.Adding Accessories
Enhance Woody’s charm by sketching his signature cowboy hat and sheriff badge. Add details like his boots and holster to capture his adventurous spirit.
Adding accessories to Woody from Toy Story can make your drawing more detailed and authentic. The right accessories bring out Woody’s personality and style. Follow these steps to add key accessories to your Woody drawing.Bandana
Woody’s bandana is a bright red color. Draw a small triangle around his neck. Make sure it sits just above his shirt. Use curved lines to show the fabric folds. Add small details to make it look like cloth. Highlight the bandana with a few light strokes. This gives it a realistic texture.Sheriff Badge
Woody’s sheriff badge is iconic. Start with a star shape on his vest. Position it near his chest area. Add a circle in the center of the star. Include small details like edges and shine. Use short lines to show depth. Make the badge look metallic with a few shading strokes.Inking And Outlining
Inking and outlining bring Woody to life on paper. Carefully trace pencil lines with a black pen. Define his cowboy hat, boots, and smile with bold strokes.
Inking and outlining bring your Woody drawing to life. This stage defines shapes and adds depth. It’s like giving Woody his final touch.Understanding Inking Tools
Choosing the right pen is crucial. Fine-tip pens work well. They offer precision for Woody’s details. Felt-tip pens provide bold lines. Test your pen on scrap paper first. Ensure smooth ink flow.Creating Bold Outlines
Start with Woody’s hat. Use steady pressure for consistent lines. Outline his face next. Capture his smile and eyes carefully. Move to his shirt and vest. Keep lines bold and clean.Adding Fine Details
Focus on Woody’s features. Draw his signature sheriff badge. Add stitching lines on his shirt. Outline his belt and holster. Enhance details with thinner lines.Perfecting Shadows And Depth
Shadows add dimension. Use cross-hatching for texture. Shade areas like under his hat. Create depth in his vest folds. Vary line thickness for dynamic shadows. Review your work closely. Fix any uneven lines. Ensure Woody’s features are clear. Add small details you missed. Make adjustments to improve balance.
Credit: www.youtube.com
Coloring Tips
Coloring Woody from Toy Story can be a fun task. With the right colors and techniques, you can bring this beloved character to life. This section offers tips on choosing the best colors and shading methods to make your drawing stand out.
Choosing Colors
Woody has a distinctive color palette. His hat and boots are brown. Choose a warm brown for an authentic look. His shirt is yellow with red stripes. Use a bright yellow for the base. Add red carefully for the stripes. His jeans are a medium blue. Pick a shade that captures this. Don’t forget his vest. It’s white with black spots. Select a crisp white and a deep black for contrast.
Shading Techniques
Shading adds depth to your drawing. Use a darker shade of each color for shadows. For Woody’s hat, apply a darker brown under the brim. His shirt needs subtle shadows around the arms. This adds dimension. For jeans, add darker blue near creases. His boots will look more real with shadows at the heel. Blend the colors softly for a natural look.
Final Touches
Final touches bring Woody to life on the page. These details make your drawing stand out and capture the character’s personality. Focus on refining the sketch to create a polished appearance.
Highlighting Details
Use fine lines to emphasize Woody’s features. His eyes should sparkle with mischief. Add depth to his hat with subtle shading. Define his cowboy boots with crisp edges. Enhance the texture of his vest and shirt using cross-hatching. Attention to these details will enhance the realism of your drawing.
Cleaning Up The Sketch
Remove any stray marks or smudges. Use an eraser to tidy up rough edges. Ensure the lines are clean and sharp. This process makes Woody look more professional. Double-check proportions to confirm accuracy. A neat sketch can make all the difference.
Frequently Asked Questions
How Do I Start Drawing Woody From Toy Story?
Begin by sketching a simple stick figure for Woody’s basic posture. Add his cowboy hat and distinctive facial features. Use light pencil strokes for initial outlines. Focus on capturing his cheerful expression and cowboy attire. Once satisfied, darken the lines and add details like his badge and boots.
What Materials Are Best For Drawing Woody?
Use a good-quality sketchbook and pencils ranging from HB to 4B. Fine-tipped pens can add detail. Colored pencils or markers help bring Woody’s vibrant outfit to life. An eraser is essential for correcting mistakes. Digital drawing tablets are great for advanced techniques and adding precise colors.
How Can I Draw Woody’s Facial Features Accurately?
Focus on Woody’s large eyes and warm smile. Start with his oval-shaped face, then add his eyes and eyebrows. His nose is small and rounded. Pay attention to the spacing between his features. Practice capturing his playful and friendly expression by studying reference images or movie scenes.
How To Add Details To Woody’s Outfit?
Woody’s outfit includes a checkered shirt, cow-patterned vest, and star badge. Begin with his shirt, drawing the checkered pattern carefully. Add his vest with cow spots and finish with his sheriff’s badge. Don’t forget details like his belt and holster.
Use contrasting colors to make his outfit pop.
Conclusion
Drawing Woody from Toy Story can be fun and rewarding. Follow the steps, and watch your skills grow. Practice makes your art better. Each sketch helps you improve. Remember, Woody’s character has a lot of details. Focus on his hat, boots, and sheriff badge.
These features make him unique. Share your drawing with friends. They might offer helpful feedback. Enjoy the process and don’t rush. Take your time to capture Woody’s charm. Let creativity guide you. Keep drawing different characters. Your talent will shine with every new sketch.