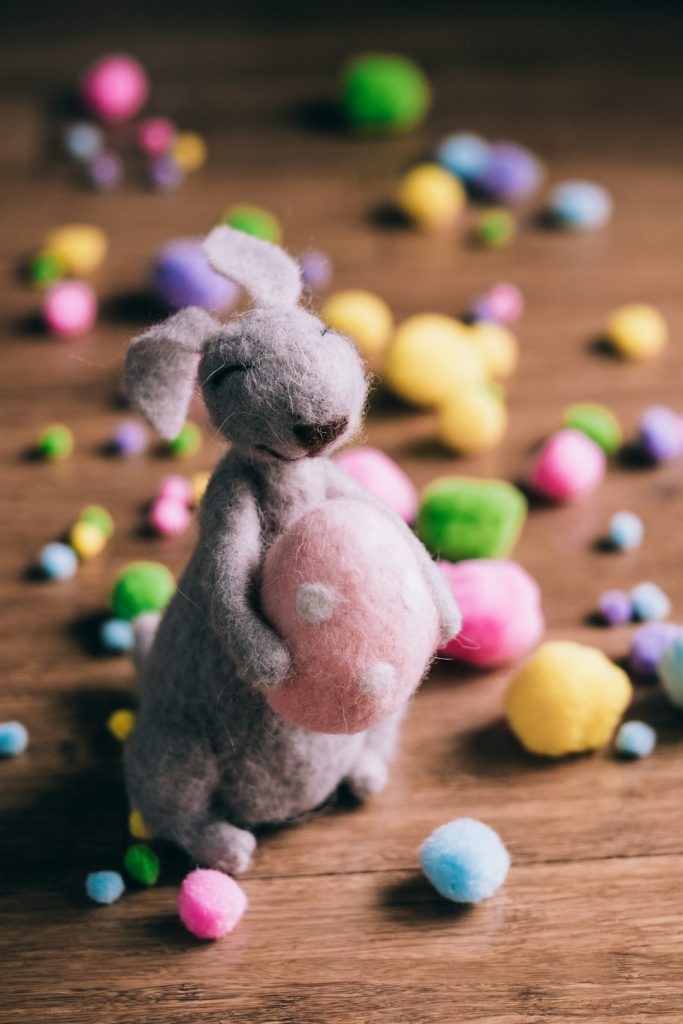
Have you ever wanted to create a soft, cuddly toy bunny all by yourself? Making your own toy bunny is easier than you think, and it’s a fun way to add a personal touch to your home or gift.
Imagine holding a cute bunny that you made with your own hands—something unique and full of love. In this guide, you’ll find simple steps that anyone can follow, even if you’ve never sewn before. Ready to bring your very own toy bunny to life?
Let’s get started!
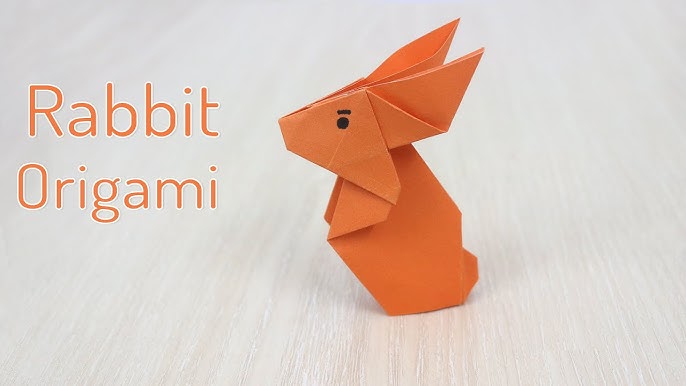
Credit: www.youtube.com
Materials Needed
Gathering the right materials sets the foundation for making a charming toy bunny. You want to choose items that are easy to work with and safe, especially if the toy is for a child. Selecting quality fabrics and stuffing can make your bunny both cuddly and durable.
Think about the colors and textures you want. Do you prefer soft cotton or fuzzy fleece? These choices affect how your bunny feels and looks, so pick what excites you the most.
Fabric
- Cotton fabric:Smooth and easy to sew, great for beginners.
- Fleece or felt:Adds softness and a cozy feel.
- Patterned fabric:Adds personality and fun to your toy.
Stuffing
- Polyester fiberfill:Lightweight and fluffy, perfect for stuffing.
- Scrap fabric pieces:A budget-friendly and eco-friendly option.
- Cotton batting:Natural and soft, but a bit firmer.
Sewing Supplies
- Needles:Choose a size that matches your fabric thickness.
- Thread:Pick a color that blends or contrasts for fun effects.
- Scissors:Sharp ones make cutting fabric easier and neater.
- Pins:Keep your fabric pieces aligned before sewing.
Details And Accessories
- Buttons or safety eyes:For adding eyes safely and securely.
- Embroidery floss:Use to stitch the nose, mouth, or decorative elements.
- Ribbon or fabric scraps:Create bows or clothes for your bunny.
Have you ever noticed how the right materials can make your project more enjoyable? Picking items you like will keep you excited throughout the process. What colors or textures do you imagine your perfect toy bunny having?

Credit: www.youtube.com
Choosing The Right Fabric
Choosing the right fabric is key to making a soft and cuddly toy bunny. The fabric affects the toy’s feel, look, and durability. Picking a fabric that is safe and easy to work with makes the project more fun and successful.
Consider the fabric’s texture and thickness. Soft fabrics create a gentle touch for little hands. Strong fabrics help the toy last longer through play.
Natural Fabrics For Softness And Safety
Cotton and linen are good choices for natural fabrics. They are breathable and gentle on the skin. Natural fabrics are less likely to cause allergies or irritation. Choose tightly woven cotton for durability and ease of sewing.
Synthetic Fabrics For Bright Colors And Stretch
Polyester and fleece offer bright colors and stretchiness. These fabrics are easy to clean and maintain. Fleece adds extra softness and warmth to the toy bunny. Synthetic fabrics dry quickly and resist wrinkles.
Fabric Weight And Durability
Lightweight fabrics are easy to sew but may tear easily. Medium-weight fabrics balance softness and strength. Heavy fabrics last longer but can be harder to shape. Choose a fabric weight that suits your sewing skill and toy design.
Patterns And Colors To Bring The Bunny To Life
- Soft pastels create a calm, gentle look.
- Bright colors make the toy fun and eye-catching.
- Small prints add charm without overwhelming the design.
- Solid colors let you highlight the bunny’s shape.
Cutting The Pattern
Cutting the pattern is a crucial step in making your toy bunny come to life. This part sets the foundation for the shape and size of your bunny, so precision matters. If you’re not careful here, the pieces might not fit together well, leading to frustration during sewing.
Creating A Template
Start by making a clear, sturdy template for each part of your bunny, like the ears, body, and limbs. Use cardboard or thick paper to draw the shapes based on your design. This lets you trace the shapes onto fabric without worrying about mistakes.
Think about how many pieces you need for each part. For example, the body usually requires two pieces sewn together, so your template should reflect that. Having a well-made template saves time and reduces fabric waste.
Marking Fabric Pieces
Lay your fabric flat on a clean surface before placing the template on top. Use tailor’s chalk or a fabric marker to trace around each template carefully. Remember to mark any notches or details that help with aligning pieces later.
Cut the fabric pieces with sharp fabric scissors to avoid jagged edges. Double-check that you’ve marked all the necessary parts before cutting. Have you ever cut fabric only to realize you missed a crucial marking? Avoid that by taking your time here.
Sewing The Bunny Parts
Sewing the bunny parts brings your toy to life. This stage shapes the soft, cuddly body and adds character with ears and limbs. Precise stitching ensures the bunny holds its form and feels comfortable to hug. Use neat, even stitches for a smooth finish. Take your time to match edges and corners perfectly. This care makes the toy durable and safe for play.
Stitching The Body
Start by aligning the front and back fabric pieces of the body. Pin them together to keep edges from shifting. Use a strong thread and a small running stitch or backstitch. Leave a small opening for stuffing. Sew slowly to keep stitches even and tight. After sewing, turn the body right side out. Fill it with soft stuffing to give the bunny its shape. Hand-sew the opening closed with small, neat stitches.
Attaching Ears And Limbs
Sew ears and limbs separately before attaching them. Fold and stitch the ears, leaving the base open for turning. Stuff lightly to keep their shape soft but firm. Sew limbs in a similar way, adding stuffing inside. Position ears and limbs on the body. Pin them securely to avoid movement while sewing. Use a whipstitch or ladder stitch to attach parts firmly. Double stitch areas that will get more wear, like arms and legs. This keeps the bunny sturdy and ready for play.
Stuffing The Toy
Stuffing your toy bunny is where it truly begins to take shape and feel alive. The right stuffing gives your bunny a soft, cuddly texture that invites hugs and play. But how much stuffing you add and how you distribute it can change the whole look and feel of your creation.
Choosing The Right Stuffing Material
Polyester fiberfill is the most common and affordable option. It’s lightweight, washable, and holds its shape well. If you want something eco-friendly, consider using scrap fabric or wool stuffing. Each type affects how firm or squishy your bunny feels.
How To Evenly Stuff Your Toy Bunny
Start by adding small amounts of stuffing to the limbs and ears. Gently push it in with your fingers or a chopstick to fill tight corners. This prevents lumps and keeps the shape smooth.
Once the smaller parts are filled, move to the body. Add stuffing gradually, pressing lightly to avoid overfilling. Ask yourself: does this part feel soft but supportive? Adjust as needed.
Tips To Avoid Overstuffing
Overstuffing can stretch the seams and distort the shape of your bunny. If the fabric looks tight or shiny, pull some stuffing out. Remember, a slightly softer toy is more enjoyable to cuddle.
Stuffing should allow your bunny to be flexible, not rigid. Imagine how you want it to sit or flop—this will guide how much stuffing to add.

Credit: www.youtube.com
Adding Facial Features
Adding facial features brings your toy bunny to life. These small details give the bunny its personality. Focus on the eyes, nose, and mouth to make it cute and expressive.
Sewing Eyes And Nose
Choose buttons or small beads for the eyes. Secure them tightly to avoid loose parts. Use a strong thread matching the bunny’s color. For the nose, use a small piece of felt or embroidery thread. Stitch it carefully in a triangle shape. This creates a soft, delicate look.
Embroidering The Mouth
Use embroidery floss in a soft pink or brown shade. Make simple stitches for the mouth shape. A small “V” or curved line works well. Keep stitches short and neat. This adds charm and a friendly smile to your bunny.
Finishing Touches
Finishing touches bring your toy bunny to life. This stage makes the bunny neat and charming. It helps ensure the toy looks complete and ready to enjoy. Small details can make a big difference in the final appearance.
Trimming Threads
Cut all loose threads carefully. Use sharp scissors for a clean cut. Avoid cutting too close to the fabric. Check every seam and edge for stray threads. Removing these threads keeps the bunny tidy. It also prevents unraveling over time.
Adding Accessories
Choose simple accessories to decorate your bunny. Tiny bows, buttons, or a small scarf work well. Sew or glue these items securely in place. Keep accessories light to avoid weighing down the toy. Accessories add personality and make your bunny unique.
Care And Maintenance Tips
Taking good care of your toy bunny keeps it soft and fresh for a long time. Proper maintenance prevents dirt and damage. These tips help your handmade toy stay beautiful and safe for children.
Cleaning Your Toy Bunny Safely
Use a gentle cloth or soft brush to remove dust. Spot clean with mild soap and water. Avoid soaking the toy to protect the stuffing. Let it air dry completely before use.
Storage Tips For Longevity
Store the toy bunny in a dry, cool place. Avoid direct sunlight to prevent color fading. Keep it away from pets and sharp objects that can cause damage.
Repairing Small Tears
Check for loose threads or small holes regularly. Use a needle and matching thread to fix tears. This stops the damage from getting worse.
Maintaining Softness And Shape
Fluff the toy bunny gently to keep its shape. Avoid squeezing or pulling hard on ears and limbs. This preserves the softness and structure.
Frequently Asked Questions
What Materials Do I Need To Make A Toy Bunny?
To make a toy bunny, gather fabric, stuffing, scissors, needle, thread, and patterns. Optional items include buttons and ribbons for decoration.
How Long Does It Take To Make A Toy Bunny?
Making a toy bunny typically takes 1 to 2 hours. Time varies based on skill level and design complexity.
Can Beginners Easily Make A Toy Bunny?
Yes, beginners can easily make a toy bunny. Follow simple patterns and use basic sewing techniques for best results.
What Type Of Fabric Is Best For Toy Bunnies?
Soft fabrics like cotton, fleece, or felt are ideal. They are safe, easy to sew, and perfect for cuddly toys.
Conclusion
Making a toy bunny is fun and simple. You just need basic materials and a little patience. Each step helps bring your bunny to life. It’s a great way to be creative and make something special. Kids and adults both can enjoy this craft.
Try different colors and fabrics to make it unique. Remember, mistakes are part of learning. Enjoy the process and share your cute bunny with friends. Crafting this toy can brighten your day and inspire more projects. Keep making and keep smiling!
