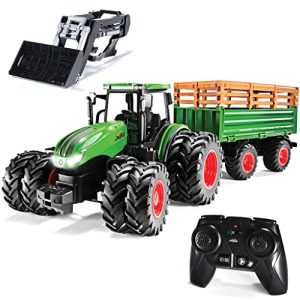
Imagine the thrill of watching a tiny car zipping across your living room floor or a mini helicopter taking flight right in your backyard. Creating your own RC (remote control) toys is not just a hobby; it’s an exciting blend of creativity, engineering, and sheer fun.
You don’t need to be a tech genius or have a workshop full of tools to make this happen. In fact, with a bit of guidance and the right materials, you can craft your very own RC toy masterpiece. This guide will walk you through each step, simplifying what might seem like a daunting task into something you can achieve.
Whether you’re looking to build a car, a plane, or something truly unique, you’ll find all the insights you need right here. Are you ready to dive into the world of RC toys and unleash your inner creator? Let’s get started!

Credit: www.youtube.com
Choosing The Right Materials
Selecting materials wisely ensures durable and efficient RC toys. Lightweight materials enhance speed and performance. Consider using strong, flexible options for parts that experience frequent movement.
Choosing the right materials is crucial in making RC toys. The materials determine the toy’s durability, performance, and environmental impact. Understanding what to use can make a big difference. Let’s explore some important aspects.Selecting Durable Components
Durability ensures your RC toy lasts longer. Choose components that withstand wear and tear. Plastic is a common choice for its lightweight nature. But not all plastics are equal. High-density polyethylene (HDPE) is a great option. It’s tough and resists impact. For metal parts, consider aluminum. It’s light, strong, and doesn’t rust easily. Rubber can be useful too. It provides grip for tires and protects against shocks.Eco-friendly Material Options
Eco-friendly materials can be a wise choice. They reduce environmental harm and promote sustainability. Bamboo is an excellent alternative to plastic. It’s strong, renewable, and biodegradable. Recycled plastics are another option. They offer durability without new plastic production. Look for parts made from recycled aluminum. This reduces waste and conserves resources. Using eco-friendly materials supports a healthier planet.Designing Your Rc Toy
Designing your RC toy involves selecting materials, assembling parts, and fine-tuning for performance. Choose lightweight components for better speed and agility. Personalize your toy with unique designs and colors to make it stand out.
Designing your RC toy is a thrilling journey. It involves creativity and technical skill. You build a toy that reflects your personal style and interests. This process starts with a vision and transforms into a tangible creation. Designing is not just about making; it’s about dreaming and bringing that dream to life. It requires attention to detail and a passion for innovation. Let’s dive into the key steps.Sketching The Blueprint
Begin with a simple sketch. This is your blueprint. Visualize your toy’s shape, size, and features. Use a pencil and paper to capture your ideas. Sketching helps you see the big picture. Imagine how the parts fit together. Consider the toy’s movement and functions. Make notes about materials and components. Keep your lines clean and clear.3d Modeling Basics
Move from paper to digital. Use 3D modeling software. It helps refine your design. Start with basic shapes. Build a virtual model of your toy. Adjust dimensions and proportions. Experiment with different angles and perspectives. 3D modeling offers precision and flexibility. It lets you test your ideas before building. You can spot and solve design problems early on.Building The Chassis
Crafting a sturdy chassis is essential for RC toy performance. Use lightweight materials for a balanced structure. Ensure proper alignment to enhance control and speed.
Building the chassis is the foundation of creating RC toys. This essential step determines the toy’s strength and performance. A well-designed chassis can ensure smooth operation on various terrains. Understanding the basics and following a structured approach helps in crafting a reliable base for your toy.Essential Tools And Equipment
To build a robust chassis, certain tools are needed. These tools include:- Screwdriver set: For assembling and securing parts.
- Drill machine: To create precise holes for screws.
- Cutting tools: For shaping materials to the required size.
- Measuring tape: Ensures accurate dimensions.
- Safety goggles: Protects eyes during drilling and cutting.
Step-by-step Assembly
Start by designing your chassis layout. Determine the size and shape based on your toy’s requirements. Cut the material to match your design. Use measuring tools for precision. Next, drill holes for the screws. Ensure they are evenly spaced for stability. Assemble the parts using the screwdriver set. Secure each part tightly to avoid any wobbling. Test the chassis for balance. Place it on a flat surface to check if it stands evenly. Adjust any uneven parts to maintain balance. Finally, reinforce the structure. Add extra support where needed to enhance durability. Double-check all connections to ensure they are firm. Building a strong chassis ensures your RC toy performs well. Taking time with assembly pays off in creating a reliable and fun toy.
Credit: www.youtube.com
Installing Electronics
Building RC toys involves connecting electronic parts like motors, batteries, and controllers. Follow instructions carefully to ensure proper assembly and safe operation. Enjoy the fun and learning experience of creating your own remote-controlled gadgets.
Installing the electronics in your RC toys is where the magic happens. This is the stage where your creation comes to life, transforming from a mere model into a fully functional remote-controlled marvel. But how do you ensure everything is set up just right? Let’s dive into the essentials.Choosing The Right Motor
The motor is the heart of your RC toy. Selecting the right one involves understanding the type of performance you desire. Are you looking for speed or torque? For instance, if you’re building a race car, you’ll want a motor that prioritizes speed. Brushless motors are often preferred for their efficiency and power. However, if your project is a crawler, opt for a brushed motor which provides better torque and control. Remember, the motor’s compatibility with the rest of your electronics is crucial. Double-check voltage requirements to avoid any mishaps.Setting Up The Remote Control System
The remote control system is your communication line with the RC toy. A reliable system ensures smooth operation without interference. Look for systems that offer a range of frequencies, especially if you’ll be using your RC in crowded areas. Installing the system involves connecting the receiver to the motor and servos. Make sure each connection is secure. Loose connections can lead to erratic movements or complete disconnection. Program the remote control to your liking. Adjust settings like throttle and steering to match your driving style. Have you ever thought about customizing the controls for a more personalized experience?Painting And Detailing
Painting and detailing RC toys involve careful attention to color choices and intricate designs. Begin by selecting paints suitable for plastic surfaces, ensuring durability. Focus on small brushes for precise detailing and let creativity flow with patterns and textures, enhancing the toy’s visual appeal.
Painting and detailing your RC toys can make them truly unique. It’s a chance to let your creativity shine and bring your vision to life. Proper techniques and tools will ensure the paint job lasts and looks professional. Let’s dive into the essentials for painting and detailing your RC toys.Selecting Paints And Brushes
Choosing the right paints is crucial. Acrylic paints work well for RC toys. They’re durable and easy to apply. Consider the surface material of your toy. Different materials need different types of paint. Brushes should be small and precise. Tiny brushes help with detailed work. Ensure the bristles are soft to avoid streaks. Quality brushes make a big difference in the final look.Creative Design Ideas
Think outside the box with your designs. Use stencils for patterns and shapes. They create clean and sharp lines. Add decals for extra flair. Decals can include logos or fun images. Mix colors to create gradients and depth. Experiment with metallic paints for a shiny effect. Personalize your toy with your favorite themes. Sports, animals, or futuristic designs can add personality. Let your imagination lead the way.
Credit: www.youtube.com
Testing And Troubleshooting
Testing and Troubleshooting Identify any issues during the assembly of RC toys to ensure smooth operation. Test each component thoroughly to locate problems. Adjust and fix any errors found to enhance performance and functionality.
Testing and troubleshooting are crucial steps in making RC toys. It’s where your creativity meets practicality, ensuring your creation runs smoothly. This phase is not just about fixing problems; it’s about understanding the nuances of your toy’s operation.Conducting Initial Tests
Once your RC toy is assembled, it’s time to see it in action. Begin with a simple test: power it up and check the basic controls. Does it move as expected? Try operating it in different directions and speeds. Use a clear, open space for testing to avoid obstacles. This helps identify any mechanical issues without external interference. Have you thought about testing in varied conditions, like different terrains or weather? These tests can uncover hidden flaws.Common Issues And Solutions
Mechanical hiccups are common during testing. If your toy doesn’t respond to commands, check the remote’s batteries first. A weak signal can disrupt performance. Another frequent issue is alignment. If the toy veers off course, adjust the steering mechanism. Sometimes, a simple tweak can make a huge difference. Electrical problems might arise too. Inspect all connections and solder points. Loose wires can lead to intermittent functionality. Are all components securely attached? Don’t be disheartened by setbacks. Each problem solved is a step closer to perfection. What’s one issue you’ve faced that taught you a valuable lesson? Sharing insights can transform challenges into learning experiences.Showcasing Your Creation
Creating RC toys can be a rewarding hobby. After all the hard work, showcasing your creation is essential. This not only lets you share your passion but also inspires others. Presenting your RC toy effectively can bring appreciation and feedback. Here are some ways to showcase your creation in the best light.
Photography Tips
Good photos can make your RC toy stand out. Use natural light for clear and bright images. Avoid direct sunlight to reduce harsh shadows. Try different angles to capture every detail of your toy. Use a plain background to keep the focus on your creation. A tripod can help avoid blurry shots. This ensures your photos are sharp and professional-looking. Take multiple shots and choose the best ones.
Joining Rc Toy Communities
RC toy communities are a great place to share your work. Many enthusiasts join forums and social media groups. These platforms allow you to post photos and discuss your projects. You can receive feedback and tips from experienced builders. Engaging with these communities can enhance your skills. You might even make new friends who share your interest. Being active in such groups can open up many opportunities.
Frequently Asked Questions
What Materials Are Needed For Making Rc Toys?
To make RC toys, you’ll need a few key materials. These include plastic or metal parts, motors, batteries, and a remote control system. Additionally, tools like screwdrivers, pliers, and glue are essential for assembly. Ensure you have all components ready to create an efficient and enjoyable toy.
How Do Rc Toys Work?
RC toys operate using radio signals. The remote control sends signals to a receiver inside the toy. This receiver processes commands to control the motors, steering, and other functions. The signals allow the user to maneuver the toy remotely, providing a fun and interactive experience.
Can Beginners Make Rc Toys At Home?
Yes, beginners can make RC toys at home with basic skills. Start with simple kits that include instructions and all necessary components. Research online tutorials and guides for additional help. Patience and attention to detail are crucial for successful assembly and operation.
How Long Does It Take To Build An Rc Toy?
Building an RC toy can take a few hours to several days. The time depends on complexity and your experience level. Simple kits are quicker, while custom builds require more time. Ensure you follow instructions carefully to avoid mistakes and ensure a smooth building process.
Conclusion
Creating RC toys is a fun and rewarding hobby. You learn new skills and enjoy the creative process. These toys bring joy to kids and adults alike. Building them can be a great bonding activity. It teaches patience and innovation.
Plus, it’s a hands-on way to understand how things work. Assembling parts and watching them move is a thrill. Whether you make cars, planes, or boats, the excitement is endless. With practice, your creations improve. Always remember safety and have fun.
Dive into the world of RC toys today. Enjoy every moment of your creation journey!