How to Make a Plush Toy: Step-by-Step Guide
Ever glanced at a plush toy and thought, “I could make that”? You’re not alone.
The charm of a cuddly, homemade plush toy holds a special allure. Imagine gifting a toy that carries your personal touch or watching your child hug something you created. Crafting your own plush toy is not just about sewing; it’s about expressing creativity and bringing joy.
In this guide, you’ll discover simple steps to transform fabric into a cherished companion. Ready to unleash your creativity and create something truly unique? Let’s dive into the world of plush toy making.

Credit: fourthwall.com
Materials Needed
Gather fabric, stuffing, and thread for creating your plush toy. Choose soft fabric like cotton or fleece. Scissors, needles, and pins are essential tools for cutting and sewing. Use buttons or felt for eyes and decorations. A sewing machine can speed up the process.
To create a plush toy, gathering the right materials is crucial. High-quality materials ensure your plush toy is both durable and adorable. Whether you’re a beginner or experienced, knowing what materials you need can make the process smoother and more enjoyable.Fabric Selection
Choose soft fabric like fleece or minky. These are perfect for plush toys. They feel cozy and are easy to sew. Cotton is another good option for a more structured feel.Stuffing Material
Polyester fiberfill is the most common stuffing choice. It’s light and fluffy, giving the toy a soft feel. For eco-friendly options, use wool or cotton stuffing.Thread And Needle
Select strong thread matching your fabric color. This makes seams less visible. Use a needle suitable for your fabric type. A sharper needle works well with thicker fabrics.Scissors And Pins
Sharp fabric scissors are essential for clean cuts. Pins hold fabric pieces together while you sew. They help maintain accuracy in your design.Pattern Paper
Pattern paper is useful for tracing designs. It helps in cutting accurate shapes. You can draw your own or find templates online.Marking Tools
Use fabric markers or chalk to outline your pattern. They are easy to remove and make the sewing process smoother.Eyes And Embellishments
Safety eyes are popular for plush toys. They are secure and child-friendly. Buttons or embroidery can also add character to your toy.Choosing A Design
Selecting a design for your plush toy involves creativity and imagination. Consider the toy’s purpose and recipient’s preferences. Sketch ideas, focusing on shapes and features that are simple yet adorable.
Choosing a design is a crucial step in making a plush toy. It sets the tone for the entire creation process and influences the materials and techniques you’ll use. Whether you’re crafting your first plush toy or adding to a growing collection, selecting the right design can be both exciting and daunting. So, how do you decide what design suits you best?Simple Vs. Complex Designs
Simple designs are perfect for beginners. They often require fewer materials and are easier to sew. Think of basic shapes like circles or squares, which can transform into charming characters with minimal effort. Complex designs, on the other hand, offer more room for creativity. They might include intricate patterns or multiple components, like limbs and accessories. While they demand more time and skill, the satisfaction of bringing a detailed design to life is unmatched. Are you ready for a challenge, or do you prefer to keep it straightforward?Finding Inspiration
Inspiration can come from anywhere. Look around your home, explore nature, or revisit childhood memories. Maybe a favorite cartoon character or a beloved pet sparks your imagination. Online platforms like Pinterest and Instagram are treasure troves of ideas. Search for plush toy designs and save those that catch your eye. You might stumble upon a unique style that resonates with you. Consider what makes you smile. Is it vibrant colors, quirky shapes, or cute animal faces? Let your joy guide your design choice, ensuring the end result is a toy you love.Creating A Pattern
Creating a pattern is the first step to making a plush toy. Trace the toy shape on paper, adding seam allowances. This blueprint guides fabric cutting and assembly, ensuring accuracy and symmetry.
Creating a pattern is the heart of making a plush toy. It’s where your imagination begins to take tangible form. A well-crafted pattern is your blueprint, guiding you from concept to cuddly creation.Drawing Your Toy
Begin by sketching your toy on paper. Don’t worry if your drawing skills aren’t perfect; this is more about capturing the essence of your idea. Think about the toy’s size and shape, and sketch it from different angles to get a full understanding of its dimensions. Consider the details, like where the eyes and limbs will go. It’s helpful to draw these elements separately and then see how they fit together. This step is crucial because it transforms your mental image into something you can work with.Making A Template
Once your sketch is ready, it’s time to turn it into a template. Trace each part of your toy onto a piece of card or sturdy paper. These pieces will serve as your cutting guides, so accuracy is key. Label each part of your template to avoid confusion later. You might find it useful to include notes about fabric types or colors directly on your template pieces. Cutting out these templates precisely will save you a lot of trouble when you’re cutting your fabric. Have you considered how the fabric’s texture might affect your final product?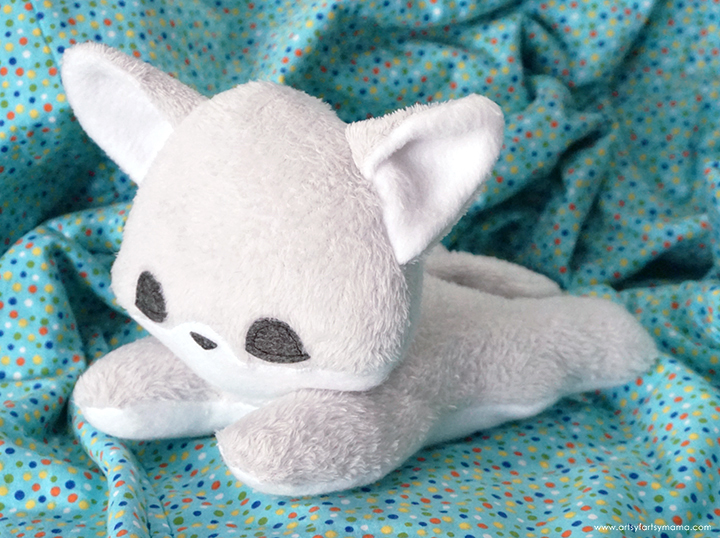
Credit: www.artsyfartsymama.com
Cutting The Fabric
Cutting the fabric is an essential step in making a plush toy. Use a pattern to trace shapes onto the fabric. Then, carefully cut along the lines for precise pieces.
Creating your own plush toy is a delightful and creative process. One of the most essential steps in this journey is cutting the fabric. This is where your plush toy begins to take shape, quite literally. The fabric you choose and how you cut it will significantly impact the final look and feel of your toy. Let’s dive into how to master this crucial step with precision and care.Selecting The Right Fabric
Choosing the right fabric is like picking the perfect canvas for a painting. Fabrics such as fleece, minky, or felt are popular choices for plush toys due to their softness and ease of handling. Consider the toy’s purpose: Is it for a child who will want to cuddle it, or is it more of a decorative piece? Additionally, think about the fabric’s durability and how it will hold up to washing. You wouldn’t want all your hard work to unravel after the first wash. Swatches can be helpful to get a feel for texture and color before making a final decision.Using The Pattern
Once you’ve selected your fabric, the next step is to use your pattern effectively. Patterns can be downloaded from the internet or drawn by hand if you’re feeling adventurous. Lay your pattern on the fabric, making sure to align any directional prints or textures as needed. Pin the pattern securely to prevent any shifting while cutting. Accuracy in this step will ensure your pieces fit together seamlessly, much like a puzzle. Remember, a little patience goes a long way in achieving a professional finish. When cutting, use sharp fabric scissors for clean edges. Dull scissors can lead to frayed edges, which might complicate sewing later. Ensure you’re cutting along the lines as precisely as possible for a clean outcome. Have you ever tried cutting fabric and found it wasn’t as simple as it seemed? Taking your time and being meticulous can turn this challenge into an enjoyable task.Sewing The Pieces
Sewing the pieces together creates the shape of your plush toy. Choose fabric and match pieces carefully. Secure stitches to ensure durability and maintain the toy’s form.
Crafting a plush toy is a delightful journey that merges creativity with hands-on skill. Once you have all your fabric pieces cut out, it’s time to bring your creation to life by sewing the pieces together. This stage is where your plush toy starts taking shape, and each stitch you make helps transform flat fabric into a three-dimensional cuddly friend. It’s a process that requires patience and precision, but also offers a fantastic opportunity to infuse personality into your plushie. So, grab your needle and thread, and let’s dive into the art of stitching your plush toy together.Stitching Techniques
Choosing the right stitching technique is crucial for the durability and appearance of your plush toy. Running stitch is great for beginners—simple and quick, it allows you to sew pieces together with ease. For a more secure finish, use the backstitch. It creates a strong seam that can withstand the playful squeezes and hugs of a plush toy. If you want to hide your stitches and give your toy a professional look, opt for the ladder stitch. This invisible stitch is perfect for closing up the final seam after stuffing. Don’t worry if it seems complex; with a bit of practice, you’ll master it in no time.Joining Sections
When joining sections, alignment is key. Begin by pinning the fabric pieces together along the edges. This ensures that everything lines up perfectly before you start sewing. It’s like piecing together a puzzle, where each section needs to fit just right. Sew the pieces in the recommended order, usually starting with smaller sections like the ears or limbs. This way, you can attach them seamlessly to the body later. Use a mix of stitching techniques as needed to secure each section firmly. As you join the sections, think about the personality of your plush toy. Will it have floppy ears or a wagging tail? This is your chance to get creative and make each piece unique. Remember, every stitch you make is a step closer to seeing your toy come to life, so enjoy the process and have fun with it!Stuffing The Toy
Stuff the plush toy by filling it with soft polyester fiberfill. Ensure it’s evenly distributed for a firm shape. Avoid overstuffing to maintain flexibility and softness. Secure the opening with neat stitching to keep the stuffing in place.
Stuffing the toy is a crucial part of making a plush toy. It’s where your creation begins to take shape and form. The right stuffing ensures that your toy is cuddly and retains its form. Let’s dive into the essentials of stuffing a toy effectively.Choosing Stuffing Material
Selecting the right stuffing is important for comfort and durability. Polyester fiberfill is a popular choice due to its softness and easy availability. Cotton batting offers a firmer feel, ideal for toys needing structure. Wool is warm and gives a natural touch. Consider your toy’s purpose and feel when choosing.Filling The Toy Evenly
Ensure an even distribution of stuffing throughout the toy. Start filling from the extremities like arms and legs. Use small amounts at a time to avoid lumps. Fill the body gradually, pressing gently to maintain shape. Check for evenness by squeezing the toy lightly. Adjust where necessary to keep a smooth feel. Remember, the stuffing affects the toy’s appearance and usability. Pay attention to these details for a delightful result.Adding Features
Sew buttons for eyes or embroider them for safety. Attach felt shapes for added texture and personality. Use fabric paint to create colorful patterns or details on the plush toy.
Adding features to your plush toy can transform a simple design into something truly unique and full of personality. It’s where your creation starts to come to life, with each detail adding character and charm. Whether you’re making a cuddly teddy bear or a quirky monster, these features will captivate anyone who sees or holds your toy.Attaching Eyes And Nose
Choosing the right eyes and nose is crucial. They become the focal points that express emotion and character. You can use plastic safety eyes and noses, which are easy to attach and secure for children’s toys. To attach them, mark the spots on your plush where the eyes and nose will go. Push the posts through the fabric and secure them with washers. This not only keeps them in place but ensures they won’t detach easily during play. Some prefer sewn eyes and noses, which can be made with embroidery thread. This method allows for more customization, from sleepy eyes to a button-like nose, and is perfect for a handmade look.Embroidery And Details
Embroidery can add a unique touch to your plush toy, making it stand out. Consider stitching a name or adding small patterns like stars or hearts. These little details personalize your creation, adding a touch of love and care. To start, choose an embroidery thread that complements your fabric. Use simple stitches like backstitch or satin stitch for a clean finish. Don’t worry if you’re new to embroidery; it’s a skill that improves with practice. Adding details can also include accessories like tiny bows or scarves. These can be sewn on or attached with fabric glue for a secure fit. Ask yourself what your plush’s personality is and what accessories might highlight it.Finishing Touches
Creating a plush toy is a rewarding endeavor that combines creativity with craftsmanship. After stitching the pieces together and stuffing your creation, the final touches can make all the difference. These steps ensure your plush toy is not only durable but also delightful to look at and play with. Let’s delve into how you can perfect your plush toy with these critical finishing touches.
Sealing Openings
One of the last steps in making a plush toy is sealing any remaining openings. Carefully thread your needle and choose a matching thread color to maintain a seamless look. Use a ladder stitch, which is perfect for closing gaps without leaving visible marks. This stitch allows the fabric to close tightly while keeping the seam invisible.
Ensure your stitches are snug but not too tight, as overly tight stitches can distort the toy’s shape. Have you ever noticed how a well-sealed plush toy feels more robust and complete? This is your goal—aim for perfection in every stitch.
Final Inspection
Before you call your plush toy finished, it’s essential to conduct a final inspection. Check all seams for any loose threads and ensure the stuffing is evenly distributed. Look over the toy for symmetry—are the eyes aligned, and is the fabric free of wrinkles?
Consider this: if you were gifting this plush toy, would you be proud of it? Asking yourself this question can help you spot areas that need refining. A thorough inspection ensures your plush toy is not just cute but also built to last.
These finishing touches transform your plush toy from a simple creation to a cherished keepsake. As you complete these steps, take pride in your craftsmanship and the joy your creation will bring to others.
Tips And Tricks
Creating a plush toy involves choosing soft fabric and a simple design. Sew pieces together carefully, leaving space to add stuffing. Finish by sewing the opening, and add details like eyes or buttons for a personalized touch.
Creating a plush toy can be an exciting and rewarding experience. Whether you’re crafting a cuddly bear for a child or a whimsical creature for yourself, a few tips and tricks can transform your creation from ordinary to extraordinary. Understanding common pitfalls and the art of personalization can make your plush toy truly unique and cherished.Common Mistakes
Even the most seasoned crafters can fall into traps when making plush toys. One prevalent mistake is choosing the wrong fabric. While a fabric might look appealing, ensure it’s suitable for sewing and stuffing. Test its durability and texture before you start. Another common error is neglecting the importance of seam allowance. Cutting fabric without sufficient seam allowance can lead to fraying and weaker seams. Always check your pattern and adjust accordingly. Rushing through the stuffing process can also compromise the final look. Take your time to evenly distribute stuffing, ensuring your toy maintains its shape and feels plush to the touch.Personalizing Your Toy
Personalization is what transforms a plush toy from a generic item into a meaningful gift. Consider adding embroidered names or initials to make it special. This can be a simple yet powerful way to showcase individuality. Think about unique features that can enhance your toy’s character. Does it need a quirky hat or a tiny scarf? Small accessories can elevate your plush toy’s charm and make it stand out. Color selection is another way to add a personal touch. Mix and match fabrics to create a vibrant palette that reflects the personality of the recipient. Your color choices can communicate moods and themes, making the toy resonate with its owner. What personal touch will you add to your plush creation?
Credit: www.youtube.com
Frequently Asked Questions
What Materials Are Needed For A Plush Toy?
To make a plush toy, you’ll need fabric, stuffing, sewing thread, needles, and scissors. Choose soft materials like fleece or cotton. You may also want embellishments like buttons or embroidery thread for added details. Ensure materials are safe for children if the toy is for them.
How Do You Choose A Plush Toy Pattern?
Select a plush toy pattern based on your skill level and desired complexity. Beginners should start with simple shapes like circles or squares. Look for patterns online or in craft books. Ensure the pattern includes clear instructions and measurements for fabric cutting.
Can I Sew A Plush Toy By Hand?
Yes, you can sew a plush toy by hand. Use a needle and strong thread for durability. Hand-sewing allows for intricate details but takes longer than machine sewing. Practice basic stitches like the running stitch or backstitch for best results.
How Do You Stuff A Plush Toy Evenly?
To stuff a plush toy evenly, use small amounts of stuffing at a time. Push stuffing into all corners and edges using a pencil or stick. Distribute the stuffing evenly to avoid lumps. Adjust as needed to achieve the desired firmness and shape.
Conclusion
Crafting a plush toy is both fun and rewarding. Simple steps lead to delightful creations. Gather materials, sketch a design, and sew with care. Stuff it gently for a soft feel. Add details like eyes or patterns. Enjoy the process and embrace mistakes.
Each plush toy is unique. Share your handmade creations with friends or family. Let imagination guide your creativity. Practice improves skill, so keep crafting. The joy of creating a plush toy is priceless. Dive into this hobby and watch your skills grow.
Happy crafting!